OnlySonoma
Member
Hey Everyone!!!
I drive a 1995 GMC Sonoma SLS 4.3L V6 RWD TBI.
I recently replaced the front passenger upper control arm.
The bushings in the control arm were literally gone and the housing where the bushing fits was damaged from the center link. This began to make some gnarly noises when driving and stopping.... imagine that.
To replace the upper control arm is really quite easy.
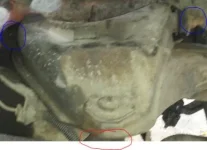
First, you'll need to remove the tire. Then you should be looking at something like the picture. The First thing I did was clean all the nuts and bolts with a wire brush. Then removed the cotter pin and and cracked the castle nut on the ball joint (circled in RED).

Next I loosened the nuts located on the outside of the bushings (circled in BLUE).I did not fully remove these nuts.
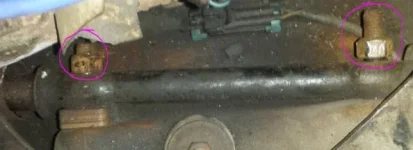
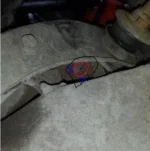
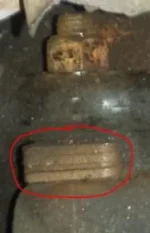
After that, from inside the engine bay, I fully removed the 2 nuts that hold the control arm to the frame. These nuts were the hardest to remove because there is limited space to work. When trying to remove one of the nuts, the bolt began to spin in place. To fix this I came in from behind with a flat head screw driver and hammered the back of the bolt head to the frame. There is a piece of metal that is fitted to the back of the bolt that is supposed to stop it from spinning.


[NOTE: one of these bolts will have spacers in between the center link and the frame. Be sure to make note and reinstall these]

The Final step to remove the upper control arm is to fully remove the castle nut on the ball joint. Then separate the ball joint. Before separating the ball joint, I placed a jack under the lower control arm so that I could easily lift it back into place.
voilà.
You have now removed the upper control arm. The new one will install the same as the old one came out.
Happy Wrenching
I drive a 1995 GMC Sonoma SLS 4.3L V6 RWD TBI.
I recently replaced the front passenger upper control arm.
The bushings in the control arm were literally gone and the housing where the bushing fits was damaged from the center link. This began to make some gnarly noises when driving and stopping.... imagine that.
To replace the upper control arm is really quite easy.
First, you'll need to remove the tire. Then you should be looking at something like the picture. The First thing I did was clean all the nuts and bolts with a wire brush. Then removed the cotter pin and and cracked the castle nut on the ball joint (circled in RED).

Next I loosened the nuts located on the outside of the bushings (circled in BLUE).I did not fully remove these nuts.
After that, from inside the engine bay, I fully removed the 2 nuts that hold the control arm to the frame. These nuts were the hardest to remove because there is limited space to work. When trying to remove one of the nuts, the bolt began to spin in place. To fix this I came in from behind with a flat head screw driver and hammered the back of the bolt head to the frame. There is a piece of metal that is fitted to the back of the bolt that is supposed to stop it from spinning.


[NOTE: one of these bolts will have spacers in between the center link and the frame. Be sure to make note and reinstall these]

The Final step to remove the upper control arm is to fully remove the castle nut on the ball joint. Then separate the ball joint. Before separating the ball joint, I placed a jack under the lower control arm so that I could easily lift it back into place.
voilà.
You have now removed the upper control arm. The new one will install the same as the old one came out.
Happy Wrenching

